A leaking bathroom tap is one of the most common plumbing issues in UK households. While it may appear minor at first, even a slow drip can waste over 5,000 litres of water per year, increasing your water bill and potentially damaging your sink area over time. In the UK, where water metering is increasingly common, especially in cities like London, Birmingham, and Manchester, fixing a leaking tap quickly is not just a convenience but a financial necessity.

This guide explains everything you need to know, from identifying the cause to completing a full repair without needing a professional plumber.
Understanding Why Bathroom Taps Leak
Before attempting any repair, it is important to understand how bathroom taps work. Most UK homes have one of the following types:
- Compression taps (older systems common in traditional UK homes)
- Ceramic disc taps (modern installations in new builds and renovations)
- Mixer taps (hot and cold combined)
Each type has different internal mechanisms, but leaks are usually caused by wear and tear.
The most common causes include:
1. Worn rubber washers
In compression taps, washers press against a valve seat to stop water flow. Over time, they degrade due to friction and water pressure.
2. Damaged ceramic cartridges
Modern taps use ceramic discs. If these crack or wear down, water continues to pass through even when the tap is closed.
3. High water pressure in UK systems
Some UK properties experience inconsistent water pressure, especially in flats or older housing systems.
4. Limescale buildup (hard water areas)
Regions like London, Kent, and Essex suffer from hard water, which leads to mineral deposits damaging internal components.
5. Loose internal fittings
Constant usage causes internal parts to loosen, allowing water to escape.
Tools You Will Need
Before starting, prepare the following tools:
- Adjustable spanner
- Flathead screwdriver
- Replacement washers or ceramic cartridge
- Cloth or towel
- White vinegar (for limescale cleaning)
- Plumber’s grease (optional but recommended)
Step-by-Step Repair Process
Step 1: Turn Off the Water Supply
Locate the isolation valve under your sink or shut off the main water supply. Always test the tap afterward to ensure no water flows.
This step is critical. Many UK DIY plumbing mistakes happen due to skipping proper isolation.
Step 2: Remove the Tap Handle
Most taps have a small screw hidden under a decorative cap. Remove the cap and unscrew the handle carefully. Lift it off gently to avoid damaging internal fittings.
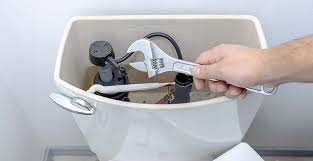
Step 3: Access the Internal Mechanism
Once the handle is removed, you will see the valve or cartridge. This is the core component responsible for controlling water flow.
Inspect it closely for:
- Cracks
- Mineral buildup
- Loose fittings
- Worn rubber seals
Step 4: Identify the Faulty Part
If you have a compression tap:
- Look for a worn rubber washer at the base
- Check the valve seat for corrosion
If you have a ceramic disc tap:
- Remove the cartridge using a spanner
- Check for cracks or stiffness in movement
Step 5: Replace the Damaged Component
For washers:
Replace the rubber washer with an identical size. Apply a small amount of plumber’s grease to improve sealing.
For cartridges:
Replace the entire ceramic cartridge. These are inexpensive and widely available in UK hardware stores like Screwfix or B&Q.
Step 6: Clean Limescale Deposits
Soak affected parts in white vinegar for 30–60 minutes to remove limescale buildup, especially important in hard water regions.
Step 7: Reassemble the Tap
Carefully reassemble all parts in reverse order. Ensure everything is tightly secured but avoid over-tightening, which can damage seals.
Step 8: Test the Repair
Turn the water back on slowly. Check both hot and cold settings. Ensure there are no drips or irregular flow.
If the leak persists, recheck the cartridge alignment or washer placement.
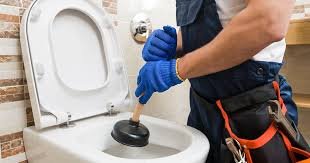
When to Call a Professional Plumber in the UK
While many tap issues are DIY-friendly, you should call a professional if:
- The valve seat is heavily corroded
- The pipework is leaking under the sink
- You cannot identify the tap type
- The leak returns shortly after repair
UK plumbing services are widely available, and many offer fixed-price tap repairs.
Preventing Future Tap Leaks
Prevention is always cheaper than repair. Here’s how UK homeowners can reduce tap problems:
- Install water softeners in hard water areas
- Avoid excessive force when turning taps
- Clean aerators every 3–6 months
- Replace washers every 2–3 years
- Regularly check under-sink plumbing for early leaks
Final Thoughts
A leaking bathroom tap is a small issue that can quickly become expensive if ignored. With the right tools and knowledge, most UK homeowners can fix it in under an hour. Regular maintenance and early detection are key to avoiding repeat issues.